I think we can all agree that Neopixels (WS2812s) are great! Being able to set the individual LEDs of a chain to different colours without complex driving circuitry has opened up so many project possibilities. I was particularly drawn to the 60 pixel ring segment Adafruit sells, having seen them used in many clock-based projects. This inspired me to start my own ring clock a year ago, which is where my experiments with 3D printing light diffusers began.
WS2812’s are very bright. This is ideal for back-lighting or creations where the LEDs are not in direct eye contact, but for any other situations it is pretty much mandatory to place them behind a diffuser or run them at a small percentage of their total brightness. I quickly found this out when working on the clock, having to reduce them to around 5-10% output to avoid them being uncomfortable to look at. At this brightness though, not only are the individual red, green, and blue diodes visible, the range of colours each LED can produce is significantly reduced. This made the fancy gradient effects I coded look blocky.
Around this time I was getting in to 3D printing, having brought myself a Prusa i3 MK2S. After getting familiar with the machine and printing the mandatory Marvin and 3D Benchy in the silver filament that came with it, I decided to try a number of samples from Rigid.ink. One of the samples I received was their silver PLA, which I quickly noticed was somewhat translucent in thinner areas of my test models even though the colour wasn’t advertised as such. This got me thinking about whether it could be used as a light diffuser for Neopixels, so I began experimenting with different thicknesses. It turns out that two 0.2mm layers (so 0.4mm total) is thin enough to let a fair amount of light through whilst having a bit of strength to it. I did also try a sample of natural PLA, but it needs to be several millimetres thick to achieve a similar amount of light diffusion and is generally less consistent due to how air gets trapped between the layers.
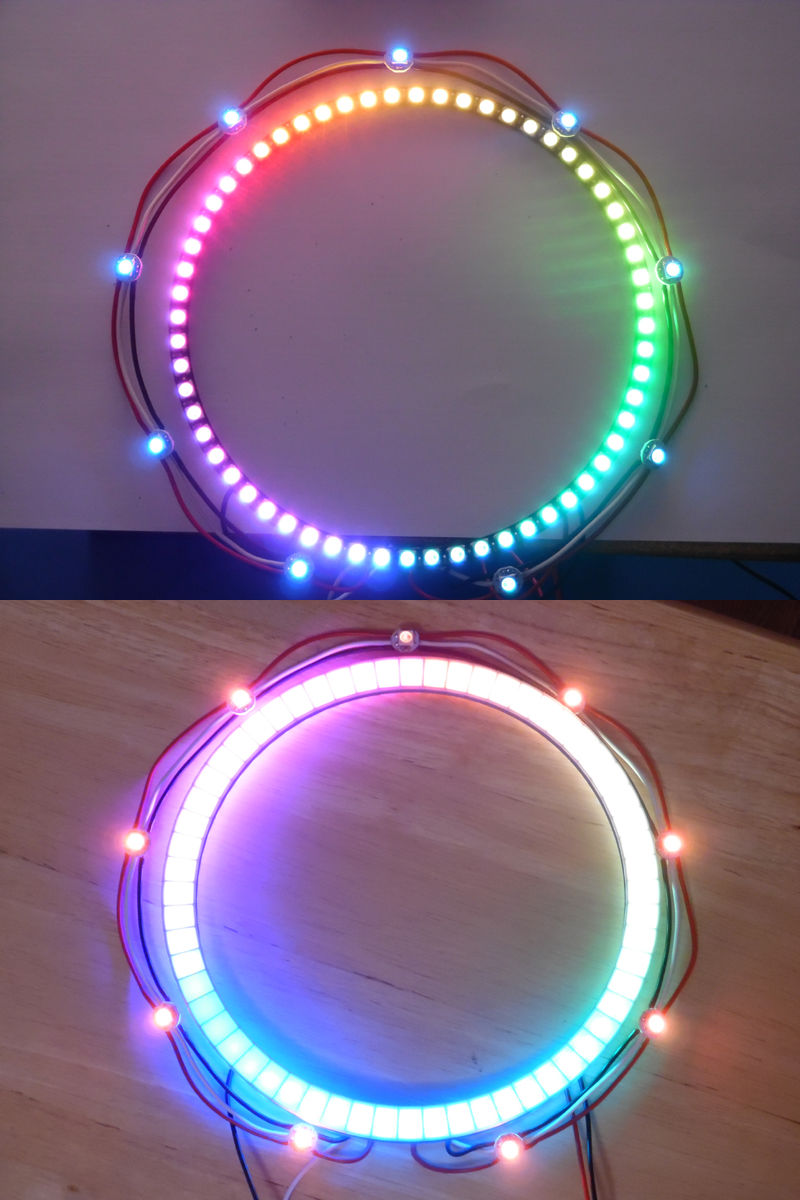
The effect of diffusing the LEDs with the Rigid.ink silver is really quite nice, and is something I recommend others try. For the clock though, I wanted each pixel to be clearly separated from the next so I designed and printed a divider piece to put behind the diffuser. For this I used Prusa silver PLA, which is notably darker and more opaque than Rigid.ink’s one. Black PLA was also an option here, but I’ve found the reflectiveness of the silver helps create a more uniform colour within each pixel. Below you can see the ring clock before and after I added the diffuser and pixel separator to it (if you were wondering why it has 9 LEDs around the outside, I’m planning to style it like a Stargate).

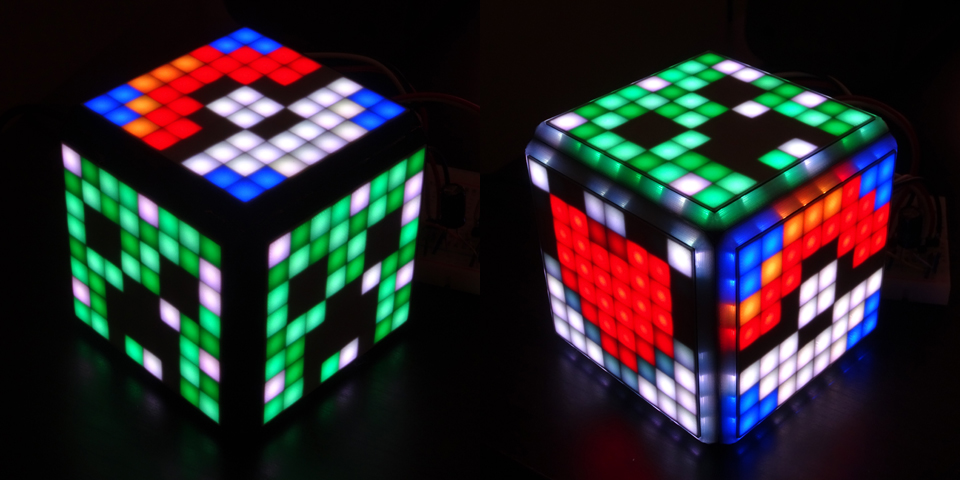
Since working on this ring clock, I have been distracted by other projects, the most recent of which being a notification cube that also uses Neopixels and 3D printed diffusers. Three 8x8 panels are used to form the three faces of the cube that will typically be seen. Originally I had the edges around each panel be black, but this quickly got annoying, so I modified the edges so that the top half could be printed in a translucent material to allow light from the edge LEDs to escape. I tried both the translucent silver and natural PLA for this, and neither produced particularly good results, so I ended up using Rigid.ink pearl PLA instead. This colour is like the natural, but with a slight milkiness to it. Here is a comparison shot of the cube with and without the translucent edges.

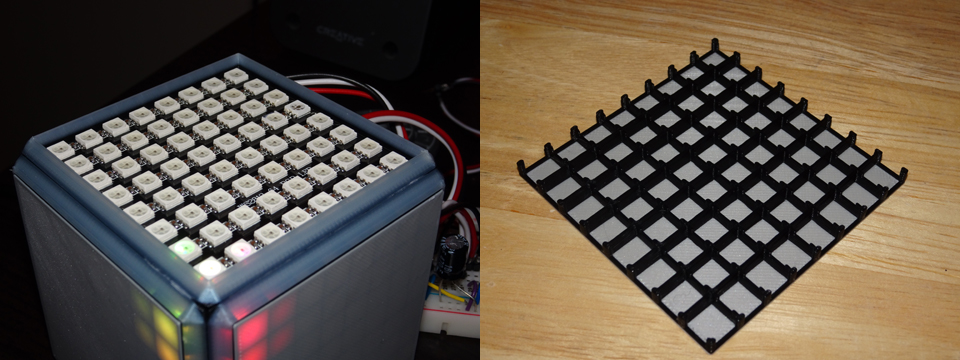
Below you can see what the panel looks like with the diffuser removed. The diffuser is shown on the right in the orientation it was printed. Unlike with the ring clock, the diffuser and divider are a single piece, using the “change colour at layer” option of the Prusa. I used this same technique to switch from black to pearl with the panel edges.

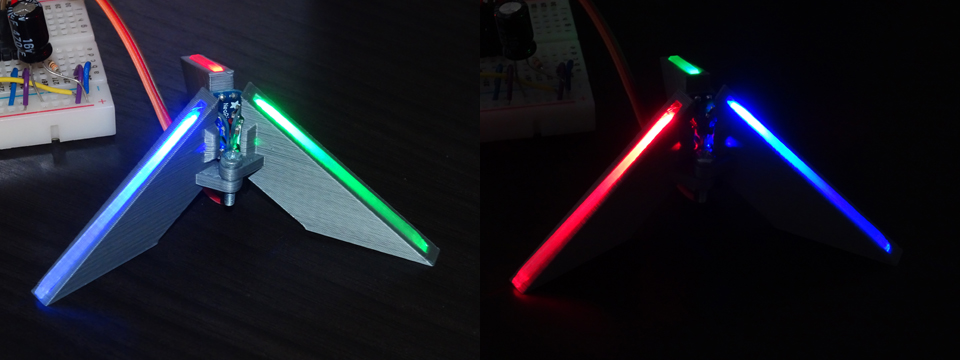
That has been my experiments with 3D printed light diffusers. I hope that this will inspire you to give it a try! It is certainly worth having some filament like the Rigid.ink silver to hand, as it’s also ideal for printing Lithophanes to give out as gifts! I’ll leave you with a picture of some light piping experiments I’ve been up to this week.

Cheers,
-Chris
